How to Build a Collapsible DIY Projector Screen for Apartments: Step-by-Step, Renter-Friendly (No-Drill) Guide
Introduction
One will learn how to create a high‑quality, portable projection surface without damaging walls or ceilings. The guide emphasizes renter‑friendly methods that rely on friction, tension, and removable hardware. By following each step, one can achieve a cinema‑grade viewing experience in a small living space. The result is a collapsible screen that can be stored in a closet when not in use.
What You'll Need
- Lightweight tripod stand or portable screen stand (e.g., PropVue 100‑Inch Projector Screen includes a sturdy tripod).
- Screen material – a pre‑stretched matte fabric or a ready‑made projector screen (e.g., HYZ 100‑Inch Projector Screen).
- Heavy‑duty Velcro straps or tension cords.
- Portable storage bag or tote.
- Measuring tape, level, and a utility knife.
Step 1: Measure and Plan Your Space
Begin by measuring the wall or freestanding area where the screen will be displayed. One should aim for a 100‑inch diagonal screen, which corresponds to a 16:9 aspect ratio of approximately 87 inches wide and 49 inches high. Record the maximum height that the tripod can reach without contacting ceiling fixtures; most portable stands provide an adjustable range of 64‑85 inches. Planning ensures that the final assembly will fit comfortably in the apartment and remain stable during use.
Why this matters: Accurate measurements prevent the need for later adjustments that could compromise the tension of the screen material. In addition, knowing the height range helps when selecting a tripod stand that matches the desired viewing angle.
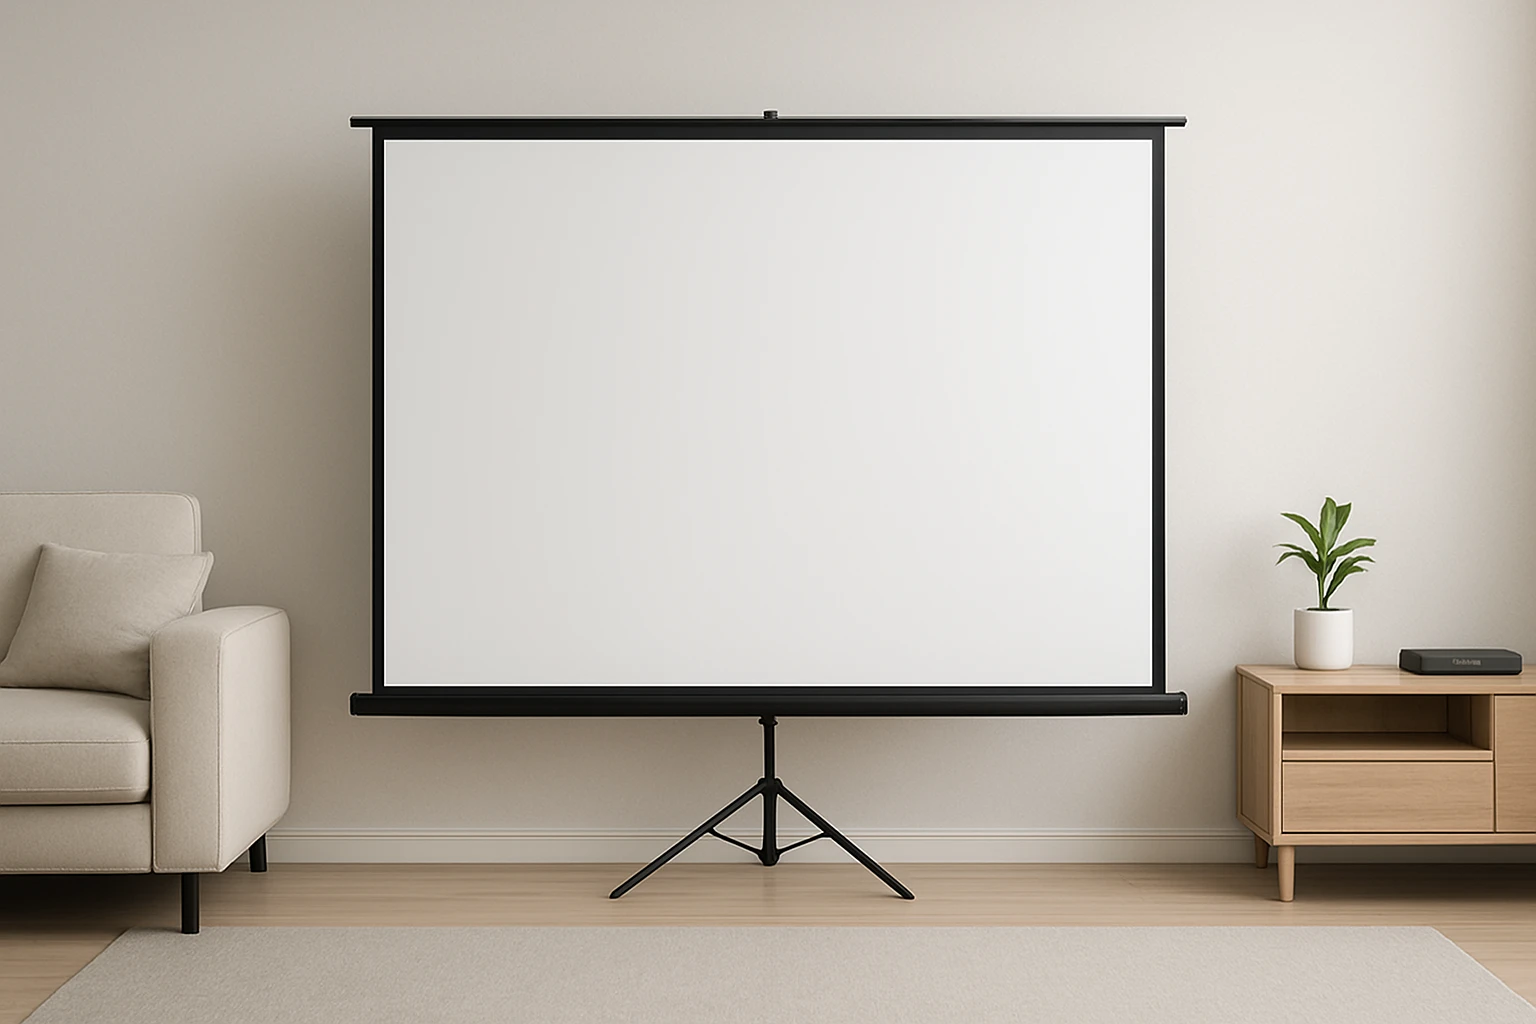
Step 2: Assemble the Portable Tripod Stand
Unpack the tripod that comes with the PropVue 100‑Inch Projector Screen. The stand features wide, anti‑slip legs and a quick‑release locking mechanism that allows height adjustments in three simple steps. Extend the legs to a comfortable working height, then lock the telescoping sections using the built‑in pins. Verify stability by gently shaking the frame; the stand should remain firm without wobbling.
The PropVue stand is praised for its reliability, with a 4.4‑star rating from 5,792 reviews and a price of $158.99. Its built‑in carry bag and straps make it easy to transport between rooms, which aligns with the renter‑friendly, no‑drill philosophy.
Step 3: Attach the Screen Material
If using a pre‑made screen such as the HYZ 100‑Inch Projector Screen, unfold the screen and locate the reinforced grommets along the top edge. Thread heavy‑duty Velcro straps through the grommets and secure them to the top crossbar of the tripod. Tighten each strap evenly to create a taut surface; uneven tension can lead to wrinkles that degrade image quality.
The HYZ screen offers a 1.5 gain, 160° viewing angle, and a 4K‑compatible matte finish, all for $94.99 and a 4.6‑star rating from 138 reviews. Its aluminum X‑type tripod is interchangeable with the PropVue stand, providing flexibility if one prefers a lighter frame.
For a custom fabric option, cut a matte blackout cloth to the measured dimensions, then attach it using the same Velcro method. Ensure the cloth has a slight oversize to allow for edge folding, which improves tension.
Step 4: Add Portability Features
Secure the assembled screen to the included carry bag using the provided straps. The bag’s reinforced handles distribute weight evenly, making it simple to lift the entire unit in a single motion. If the apartment layout requires occasional relocation, consider adding a set of small sandbags (included with the ZUVMITG 120‑Inch Outdoor Projector Screen) to the base of the tripod for added stability on uneven floors.
The ZUVMITG screen is designed for outdoor use and includes wind‑proof accessories, but its sandbags are equally useful indoors to prevent tipping on carpeted surfaces. Although priced at $0 (included with the product), the sandbags illustrate a low‑cost method to enhance safety without permanent installation.
Step 5: Finish and Test the Setup
Position the screen at the desired viewing distance, typically 1.5 to 2.5 times the screen width for optimal focus. Turn on the projector and project a test pattern to check for uniform brightness and color accuracy. Adjust the tension of the Velcro straps if any distortion appears, and re‑level the tripod using the built‑in bubble level.
Once the image is satisfactory, fold the screen back into its bag and store it in a closet or under a bed. The entire process from unpacking to ready‑to‑watch should take less than ten minutes, making it practical for spontaneous movie nights.
Tips & Pro Tips
- Use a thin rubber mat beneath the tripod legs on hardwood floors to prevent scratches.
- When projecting in a bright room, choose a screen with a higher gain (e.g., HYZ 1.5 gain) to improve contrast.
- For extra tension, add a second set of Velcro straps at the bottom edge of the screen.
- Store the screen in a climate‑controlled area to avoid moisture damage to the fabric.
Troubleshooting
- Screen appears dim or washed out: Verify that the projector is set to the correct aspect ratio and that the screen is fully taut.
- Screen wobles during playback: Place sandbags or weighted books on the tripod base, or tighten the leg locks further.
- Image shows ghosting or double lines: Ensure the screen material is perfectly flat; re‑adjust the Velcro straps to eliminate any folds.
Conclusion
One has now mastered a renter‑friendly, no‑drill method to build a collapsible DIY projector screen that delivers cinema‑grade performance. By leveraging portable tripod stands and high‑quality screen fabrics, the solution remains affordable, easy to assemble, and simple to store. The guide empowers apartment dwellers to enjoy immersive movie nights without compromising lease agreements. Embrace the flexibility of this system and invite friends over for unforgettable viewing experiences.
Products Mentioned in This Guide
Frequently Asked Questions
What materials are needed to build a renter‑friendly collapsible projector screen?
You need a lightweight tripod or portable stand, a pre‑stretched matte fabric or ready‑made screen, heavy‑duty Velcro straps or tension cords, a storage bag, and basic tools like a measuring tape and utility knife.
Can I install the DIY screen without drilling into walls or ceiling?
Yes, the guide uses friction, tension, and removable hardware such as Velcro straps to secure the screen without any permanent holes.
How do I ensure the screen stays level and taut when set up?
Attach the screen material to the tripod using tension cords or Velcro straps, then adjust the cords until the surface is evenly tensioned and use a level to confirm it’s straight.
What is the best way to store the collapsible screen when not in use?
Fold the screen material neatly, secure it with the Velcro straps, and place it in a portable storage bag or tote that fits in a closet.
Will a DIY collapsible screen provide cinema‑grade image quality?
When using a matte, pre‑stretched fabric and proper tension, the DIY screen can deliver a high‑quality, glare‑free image comparable to commercial screens for most home‑theater setups.