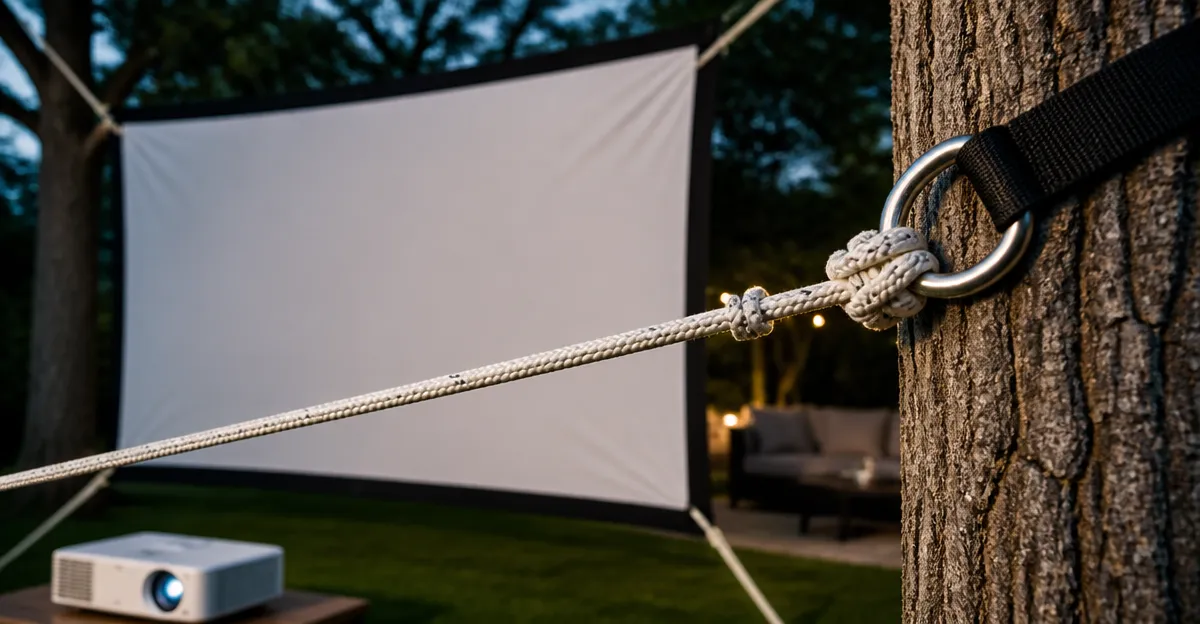
How to Tie the Best Knots to Secure Outdoor Projector Screens: 7 Easy, Windproof Knots for Outdoor Movie Nights
Introduction
Outdoor movie nights have become a popular way to enjoy cinema under the stars. However, a screen that flutters in the wind can ruin the viewing experience. This guide teaches the reader how to select appropriate rope, how to tie seven reliable knots, and why each knot resists wind and tension. By the end of the article the reader will be able to set up a stable screen that remains taut even when the breeze picks up.
The instructions are written for an intermediate audience who already knows basic knot terminology. The language remains professional and each step is explained in detail. The guide also recommends high‑quality ropes that are available on Amazon, allowing the reader to purchase tools that are proven by thousands of positive reviews.
What You’ll Need
- Paracord or utility rope with a minimum breaking strength of 550 lb (250 kg)
- Ratchet tie‑down straps for quick adjustments
- Scissors or a sharp knife and a lighter for sealing rope ends
- Measuring tape and a marker
- Optional: reflective rope for night‑time visibility
All of the above items can be sourced from Amazon. The first mention of each product below includes a direct affiliate link.
Step 1 – Choose the Right Rope
Before any knot is tied, the reader must select a rope that offers both strength and durability. The TECEUM 550 Paracord Rope provides a 550 lb tensile strength, UV resistance, and a 100‑foot length for most backyard setups. It is priced at $6.99 and holds a 4.7‑star rating from over 9,200 reviewers, indicating reliable performance in outdoor conditions.
For readers who prefer an Amazon‑brand option, the Amazon Basics 550 Paracord offers comparable strength at $7.34 with a 4.7‑star rating from 6,800 reviews. Its orange color improves visibility during daylight, which can be helpful when adjusting tension.
If night‑time visibility is a priority, the X XBEN Reflective Paracord adds reflective strips that glow under vehicle lights. It costs $6.99 and carries a 4.6‑star rating from 1,500 reviewers. The reflective feature does not compromise strength; the rope still breaks at 1,000 lb, far exceeding the needs of a projector screen.
All three ropes are lightweight, easy to cut, and can be melted at the ends to prevent fraying. The reader should measure the distance between anchor points, add a 20‑percent safety margin, and cut the rope accordingly.
Step 2 – Prepare the Rope Ends
After cutting, the reader must seal the rope ends to maintain strength. Using a lighter, one should melt the outer sheath and inner strands together for about three seconds. The melted tip should be pressed with a flat surface to create a smooth seal. This prevents the strands from separating when the knot is loaded.
If the reader prefers a quick‑release method, the STAYGROW Rope Hangers can be employed. Each hanger includes a ratchet mechanism that locks the rope in place without permanent knots. The 4‑pack costs $8.99 and enjoys a 4.6‑star rating from 2,700 reviewers. The ratchet straps are rated for up to 75 lb each, which is sufficient for fine‑tuning tension after the primary knots are tied.
When using ratchet straps, the reader should thread the rope through the hook, pull to the desired tension, and then engage the ratchet until the handle stops. This method allows rapid adjustments without re‑tying knots.
Step 3 – The Bowline Knot (Secure Anchor Point)
The Bowline creates a fixed loop that will not slip under load, making it ideal for attaching the rope to a pole or a grommet on the screen frame. To tie the Bowline:
- Form a small loop in the standing part of the rope, leaving a short tail on the top side.
- Pass the tail up through the loop, around the standing part, and back down through the loop.
- Pull the tail while holding the standing part to tighten the knot.
This knot is easy to untie after the load is released, which is useful for seasonal storage. The TECEUM 550 Paracord is especially well‑suited because its 4 mm diameter provides a smooth surface for the loop to slide without abrasion.
For a visual reference, the reader may watch a short tutorial video on any major video platform, but the written steps above are sufficient for a competent user.
Step 4 – The Taut‑Line Hitch (Adjustable Tension)
The Taut‑Line Hitch allows the reader to slide the knot along the rope to increase or decrease tension while the knot remains locked under load. This is perfect for fine‑tuning a screen that sags after wind gusts.
- Wrap the working end around the standing part and make a turn.
- Pass the working end through the loop created by the turn.
- Make a second turn around the standing part and pass the working end through the new loop.
- Pull the standing part to snug the knot; the knot will slide when the standing part is released.
The Amazon Basics 550 Paracord’s orange sheath is easy to see when adjusting the knot, reducing the chance of accidental loosening. Its nylon core resists water absorption, ensuring the knot does not slip when the rope becomes damp.
Step 5 – The Double Sheet Bend (Connecting Two Ropes)
When the distance between anchors exceeds the length of a single rope, the reader may need to join two pieces. The Double Sheet Bend creates a strong, non‑slipping connection.
- Form a bight in the first rope (the standing rope).
- Pass the end of the second rope through the bight from behind, then around both parts of the standing rope.
- Make a second turn around the standing rope and tuck the end under the last turn.
- Pull both standing parts to tighten.
The X XBEN Reflective Paracord’s 13‑strand construction distributes load evenly, making the bend exceptionally secure. The reflective strip also helps the reader see the knot in low‑light conditions, which is valuable during evening setups.
Step 6 – The Clove Hitch (Securing to Poles)
The Clove Hitch is a quick way to attach the rope to a pole, fence post, or tree branch. It holds well under steady tension but can slip if the load is dynamic; therefore the reader should combine it with a Taut‑Line Hitch for added security.
- Wrap the rope around the pole and cross it over itself.
- Make a second wrap, crossing over the first turn.
- Pull the working end tight; the two turns should sit snugly against the pole.
Using the SMART&CASUAL Polyester Utility Rope for the Clove Hitch offers a smooth glide over wooden or metal surfaces. Priced at $6.99 with a 4.6‑star rating, this rope resists moisture and UV degradation, ensuring the hitch does not weaken over multiple seasons.
Step 7 – The Figure‑Eight Loop (Safety Backup)
For a final safety backup, the Figure‑Eight Loop creates a strong stopper knot that can be clipped to a carabiner or a hook on the screen frame. It is especially useful when the screen is mounted on a temporary tripod.
- Form a loop in the rope and bring the working end around the standing part.
- Pass the working end through the loop, then back around the standing part, and finally back through the loop again.
- Pull both ends to tighten; the knot will resemble the number eight.
The TECEUM 550 Paracord’s strong sheath prevents the knot from slipping, while the figure‑eight shape provides a clear visual cue that the knot is properly seated.
Tips & Pro Tips
- Always test each knot with a load equal to at least 50 % of the rope’s rated strength before securing the screen.
- When working in windy conditions, pre‑tighten the Taut‑Line Hitch and then add a secondary knot such as a Double Sheet Bend for redundancy.
- Seal all cut ends with a lighter to avoid fraying, especially on polyester ropes that tend to split when exposed to UV.
- Use reflective rope only when the screen will be viewed after sunset; the added visibility outweighs the slight increase in cost.
- Store all ropes in a dry, shaded area to preserve tensile strength and prevent mildew.
Troubleshooting
| Problem | Cause | Solution |
|---|---|---|
| Knot slips under load | Improperly tightened or low‑friction rope | Retighten the knot, add a Taut‑Line Hitch, or switch to a rope with a textured sheath such as TECEUM 550 Paracord. |
| Rope frays after cutting | Ends not sealed | Use a lighter to melt the ends and compress the sheath with a flat tool. |
| Screen sags after wind gust | Insufficient tension or single‑point anchoring | Employ multiple anchor points, use ratchet straps (STAYGROW Rope Hangers) for quick tension adjustments. |
Conclusion
By selecting a strong, weather‑resistant rope and mastering seven wind‑proof knots, the reader can create a reliable outdoor projector screen that remains taut in breezy conditions. The guide has presented step‑by‑step instructions, product recommendations, and troubleshooting advice to ensure a seamless movie night experience. One can now enjoy cinematic entertainment under the stars without the distraction of a flapping screen.
Products Mentioned in This Guide
Frequently Asked Questions
What type of rope is best for securing an outdoor projector screen?
Use paracord or utility rope with at least a 550 lb (250 kg) breaking strength for durability and wind resistance.
How do I choose the right knot for wind resistance?
Select knots like the taut‑line hitch, bowline, or double fisherman’s knot, which hold under tension and won’t slip in breezy conditions.
Can I use ratchet tie‑down straps instead of knots?
Yes, ratchet straps provide quick adjustments and strong hold, but combine them with a knot for extra security on the corners.
How do I prevent rope ends from fraying after cutting?
Trim the rope cleanly, then melt the ends with a lighter or apply a heat‑seal to seal the fibers.
How often should I check and retighten the knots during a movie night?
Inspect the knots every 30‑45 minutes, especially if wind picks up, and retighten as needed to keep the screen taut.