Introduction
One will discover how to transform a modest venue into a vibrant 24‑hour pop‑up cinema that attracts audiences from dusk until dawn. This guide outlines each essential phase, from site selection to equipment configuration, and provides a practical checklist that ensures smooth operation. By following the step‑by‑step instructions, one can deliver a cinematic experience that rivals permanent theatres while maintaining flexibility and cost‑effectiveness. The value of this knowledge lies in its ability to empower organizers to host memorable events without extensive technical expertise.
What You’ll Need
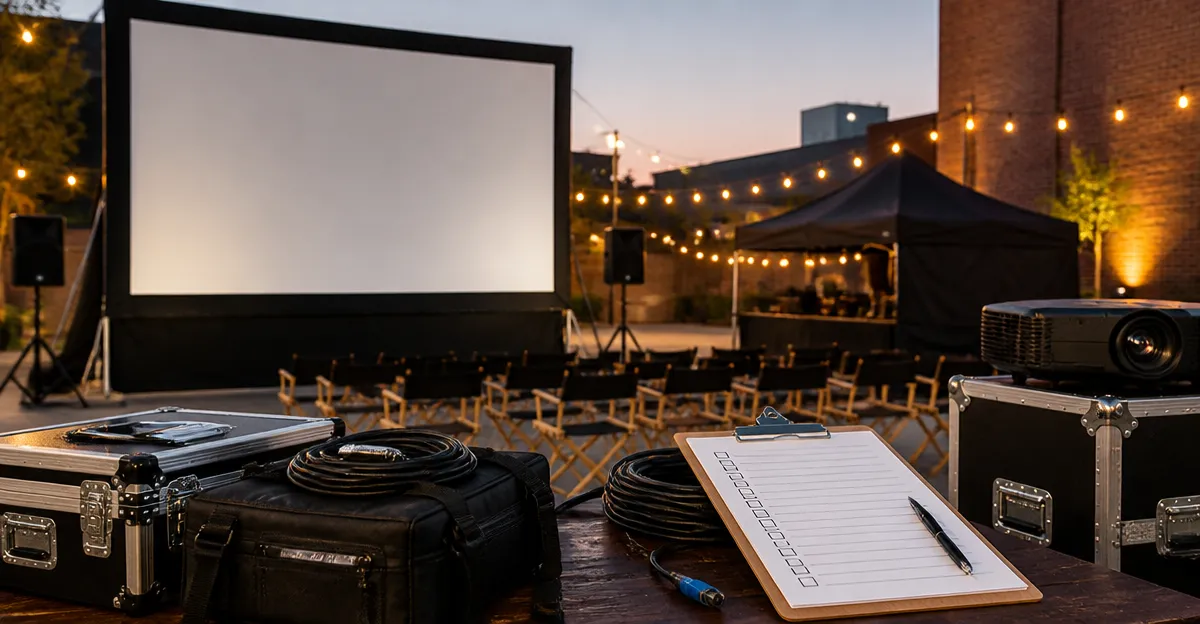
The following materials constitute the core toolkit for a successful pop‑up cinema. One may acquire additional items based on venue size and local regulations.
- Projection device – see recommendations in the equipment section.
- Screen or suitable projection surface (white backdrop, portable screen, or tensioned fabric).
- Audio system – portable speakers or soundbar compatible with the projector.
- Power distribution – extension cords, surge protectors, and backup generators if required.
- Connectivity tools – HDMI cables, Wi‑Fi routers, Bluetooth adapters.
- Seating and ambiance – folding chairs, blankets, string lights, and signage.
- Safety supplies – fire extinguishers, cable covers, and crowd‑control barriers.
Step 1: Choose the Ideal Projection Device
One should begin by selecting a projector that balances image quality, portability, and smart‑streaming capabilities. The Aurzen Roku TV D1R Projector offers 1080p full‑HD resolution, built‑in Roku streaming, and auto‑focus technology, making it suitable for both indoor and outdoor venues. Priced at $129.99, it carries a 4.6‑star rating from 861 reviews, indicating reliable performance. Its dual‑band Wi‑Fi and Bluetooth 5.2 enable seamless connection to streaming services and external audio devices without additional dongles.
For organizers who prioritize extreme portability and a lower budget, the HAPPRUN 1080P Outdoor Smart Projector delivers native 1080p resolution in a compact form factor. At $84.93 and a 4.4‑star rating from 13,613 reviews, it provides built‑in Hi‑Fi stereo speakers and Bluetooth 5.1 for wireless audio. Its mini size permits placement on small tables or backpacks, ideal for pop‑up locations with limited space.
If the event demands higher brightness for daytime screenings, the Epson EpiqVision Flex Projector supplies 3,000 lumens and 3‑chip 3LCD technology, ensuring vivid colors even in ambient light. Although the price is not listed, its 4.4‑star rating from 856 reviews confirms strong market acceptance. This model is particularly advantageous for venues that cannot control lighting conditions.
One should match the projector choice to the expected ambient light, audience size, and budget. The Aurzen model excels in integrated streaming, the HAPPRUN model excels in ultra‑lightweight mobility, and the Epson model excels in brightness and color accuracy.
Step 2: Prepare the Projection Surface
One must secure a flat, white surface that maximizes image sharpness. Portable pull‑down screens with a 100‑inch diagonal are common, yet a smooth white sheet stretched over a frame can achieve comparable results at lower cost. When using a wall, one should verify that the paint finish is matte to reduce glare. The projector’s keystone correction feature, available on the Aurzen and HAPPRUN units, compensates for slight angle deviations, but a perpendicular setup yields the best image uniformity.
To prevent image distortion, one should measure the distance between the projector lens and the screen according to the device’s throw ratio. The Aurzen D1R specifies a throw distance of approximately 2.5 to 3 meters for a 100‑inch image; the HAPPRUN model offers a similar range, while the Epson Flex provides a flexible short‑throw configuration, allowing placement closer to the screen.
One should also consider weather protection if the event is outdoors. A lightweight canopy or portable tent shields the screen and projector from rain, dust, and wind, preserving equipment longevity.
Step 3: Set Up Power and Connectivity
One must ensure reliable electricity for continuous operation over 24 hours. Extension cords rated for outdoor use should be routed through cable covers to avoid tripping hazards. A surge protector safeguards sensitive electronics from voltage spikes, especially in venues with unstable power grids.
For streaming content, the Aurzen projector’s built‑in Roku platform requires a stable Wi‑Fi connection. One should position a dual‑band router within 10 meters of the projector to maintain high‑throughput data transfer. If the venue lacks Wi‑Fi, a mobile hotspot with a data plan of at least 10 GB per day prevents buffering during peak viewing periods.
The HAPPRUN projector relies on HDMI input for source devices. One may connect a Fire TV Stick, Chromecast, or laptop via HDMI cable; the device then accesses streaming services. Bluetooth 5.1 facilitates wireless audio pairing with external speakers, reducing cable clutter.
The Epson Flex includes a dedicated HDMI port and supports external streaming sticks. One should verify that the HDMI cable length does not exceed 15 meters to avoid signal degradation.
Step 4: Optimize Audio Experience
One should assess whether the built‑in speakers meet the audience size. The Aurzen D1R’s dual 5 W speakers deliver clear sound for small groups, but larger gatherings benefit from external speakers. Connecting a Bluetooth soundbar to the Aurzen projector enhances bass response while preserving wireless convenience.
The HAPPRUN projector’s Hi‑Fi stereo speakers are adequate for intimate settings; however, its Bluetooth 5.1 capability allows pairing with a portable PA system for louder environments. One must ensure the speaker’s power rating matches the venue’s acoustics to avoid distortion.
The Epson Flex features a 5 W integrated speaker, which serves as a backup audio source. For premium sound, one can connect a powered bookshelf speaker via the projector’s audio‑out jack, delivering richer tonal balance.
In all cases, one should perform a sound check at the intended listening distance, adjusting volume levels to avoid clipping while maintaining intelligibility of dialogue.
Step 5: Arrange Seating and Ambiance
One should provide comfortable seating that encourages prolonged viewing. Folding chairs with padded cushions, bean bags, or picnic blankets create a relaxed atmosphere. Arrange seating in a semi‑circular layout to maximize sightlines and promote social interaction.
Lighting plays a crucial role in audience comfort. Soft string lights or LED lanterns positioned behind the screen provide ambient illumination without washing out the projected image. One must test the lighting levels before the first screening to ensure the picture remains vivid.
Signage indicating program schedules, restroom locations, and emergency exits enhances the professional feel of the pop‑up cinema. Durable printed posters can be mounted on easels or attached to portable boards.
Finally, one should stock refreshments such as popcorn, bottled water, and light snacks, which increase dwell time and revenue potential.
Step 6: Conduct a Full Technical Rehearsal
One should allocate at least two hours before the opening to verify all systems. Power on the projector, confirm auto‑focus and keystone alignment, and test Wi‑Fi streaming on the selected platform. Play a short test clip to evaluate image sharpness, color fidelity, and audio synchronization.
If external speakers are employed, run a full‑volume test track to identify any distortion or latency. Adjust equalizer settings on the speaker or projector as needed.
Check that all cables are securely fastened and that backup power sources, such as a portable battery pack, are ready in case of outages. Document any adjustments in a checklist for future events.
One should also verify compliance with local noise ordinances and obtain any required permits for outdoor gatherings.
Tips & Pro Tips
- Schedule screenings during low‑light periods to reduce reliance on projector brightness.
- Use a wireless presenter to control playback from a distance, minimizing interruptions.
- Employ a weather‑proof enclosure for the projector when operating in open‑air environments.
- Rotate content between movies, short films, and live streams to maintain audience engagement over the 24‑hour cycle.
- Maintain a log of power consumption to optimize generator fuel usage.
Troubleshooting
| Problem | Possible Cause | Solution |
|---|---|---|
| Image appears blurry | Improper focus or keystone settings | Activate auto‑focus feature; adjust projector distance; use manual keystone if needed. |
| Audio drops or lags | Bluetooth interference or low‑quality source | Switch to wired audio connection; reduce distance between devices; ensure Bluetooth firmware is updated. |
| Streaming buffers frequently | Insufficient bandwidth | Upgrade to a higher‑speed internet plan or use a wired Ethernet adapter if supported. |
| Projector shuts down unexpectedly | Overheating | Provide adequate ventilation; avoid direct sunlight on the projector’s vents; use a cooling fan. |
Conclusion
One has now learned how to plan, equip, and operate a 24‑hour pop‑up cinema with a clear checklist and practical recommendations. By selecting the appropriate projector, securing power and audio, and creating a welcoming environment, one can deliver an unforgettable cinematic experience that operates around the clock. The guide encourages organizers to apply these steps, adapt them to local conditions, and enjoy the creative satisfaction of hosting a successful event.
Products Mentioned in This Guide
Frequently Asked Questions
What are the essential pieces of equipment for a 24‑hour pop‑up cinema?
You need a projector, a screen or suitable projection surface, an audio system, power distribution gear, and connectivity tools like HDMI cables.
How can I ensure reliable power for an all‑night cinema event?
Use extension cords, surge protectors, and a backup generator or UPS to prevent outages during the event.
What factors should I consider when selecting a venue for a pop‑up cinema?
Choose a location with adequate space, controlled lighting, easy access for equipment, and compliance with local safety regulations.
Do I need special permits or licenses to run a 24‑hour pop‑up cinema?
Check local regulations for event permits, noise ordinances, and fire safety requirements before setting up.
How can I keep the setup cost‑effective while maintaining quality?
Opt for portable, budget‑friendly gear, reuse existing screens or fabrics, and prioritize essential audio‑visual components over luxury extras.