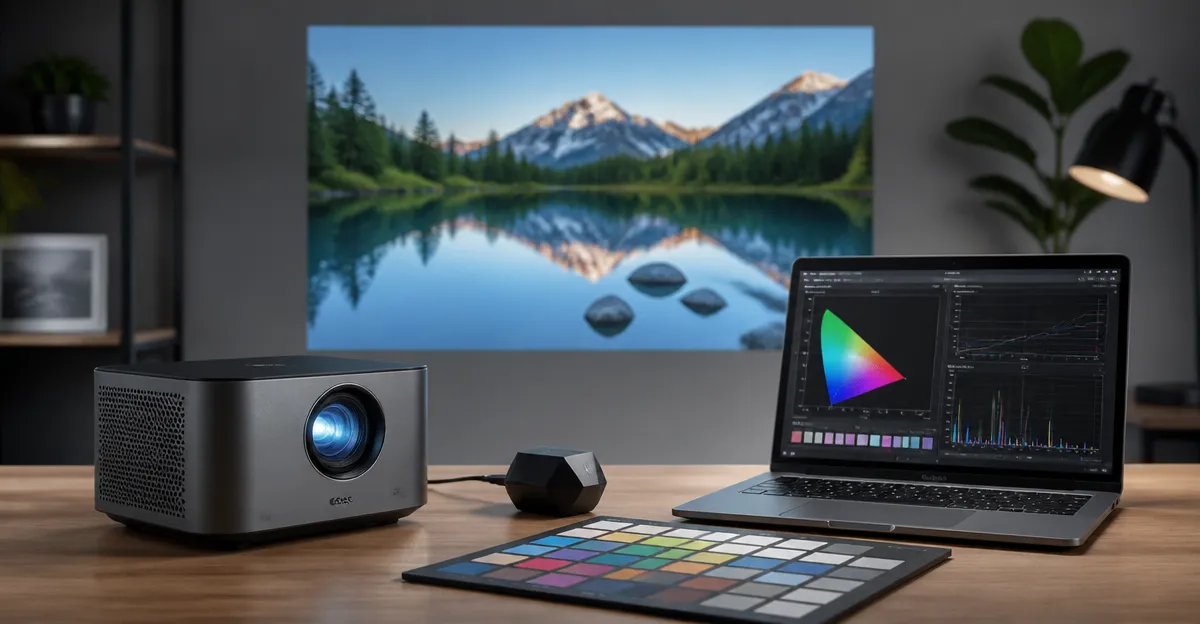
Introduction
This guide explains how to develop a precise color profile for a mini projector, ensuring accurate colour reproduction across diverse viewing environments. By following the step‑by‑step instructions, one can achieve a calibrated image that matches the original source material, whether the projector is used for home cinema, presentations, or artistic work. The process combines software tools, hardware accessories, and practical adjustments, all described in a professional manner. Mastering colour calibration adds value to a modest‑priced projector, extending its usefulness and improving viewer satisfaction.
What You’ll Need
- A mini projector such as the AKIYO Mini Projector (price $41.99, rating 4.2/5 from 5,505 reviews)
- A calibrated colour reference disc (e.g., Disney World’s ColorChecker or similar)
- A laptop or desktop computer with HDMI output
- An HDMI cable (high‑speed, 4 K compatible)
- Calibration software (e.g., CalMAN, DisplayCAL, or free alternatives)
- A USB‑C or micro‑HDMI to HDMI adapter if the projector requires it
- A stable tripod or ceiling mount for consistent positioning (the HAPPRUN Native 1080P Projector includes a tripod mount and can serve as a reference unit)
Step 1: Prepare the Projection Environment
Begin by selecting a room with controllable ambient lighting; a darkened space reduces wash‑out and provides a reliable baseline for colour measurements. Hang a plain white screen or use a smooth, matte wall surface that is free of texture, as uneven surfaces introduce colour shifts. Position the projector at the intended viewing distance, using the 360° rotating stand of the AKIYO Mini Projector to achieve the desired angle without tilting the device.
Allow the projector to warm up for at least five minutes; the lamp (or LED) stabilises its output during this period, preventing drift in brightness and colour temperature. Verify that the projector is set to its native resolution—1080P for both the AKIYO and HAPPRUN models—to avoid scaling artefacts that could affect calibration data.
Disable any automatic picture modes (e.g., Dynamic, Vivid, Cinema) and set the picture mode to “Standard” or “User”. This ensures that the calibration software interacts with a neutral image pipeline.
Turn off any built‑in image processing features such as motion smoothing, noise reduction, or edge enhancement, as these can interfere with accurate colour measurement.
Step 2: Connect the Projector to a Calibration Source
Use a high‑quality HDMI cable to link the laptop to the projector. If the projector only supports a micro‑HDMI input, employ the appropriate adapter; the HAPPRUN Native 1080P Projector recommends a Micro‑USB/Type‑C to HDMI cable for Android devices, illustrating the importance of correct adapters.
For wireless testing, the AKIYO Mini Projector offers a P2P direct connection that eliminates the need for a Wi‑Fi network, allowing a smartphone to cast the calibration pattern directly. This feature is useful when a wired connection is impractical, such as during on‑site installations.
Ensure that the projector receives power from a stable outlet; voltage fluctuations can cause colour temperature variance during the calibration process.
Open the calibration software on the computer, select the projector as the display device, and set the output colour space to “Rec. 709” for standard HD content or “Rec. 2020” for HDR workflows.
Step 3: Generate and Display Test Patterns
Load a series of standardized test patterns, such as greyscale ramps, colour bars, and the colour reference disc, onto the projector. The software will typically provide a “Full‑Screen” mode that eliminates borders and ensures the image fills the projection area.
Using the AKIYO Mini Projector’s auto‑keystone correction, align the image so that the test pattern is perfectly rectangular; this eliminates geometric distortion that could skew colour measurements.
If the projector supports zoom, adjust it to fill the screen without clipping the edges of the test pattern. The 50% zoom function on the AKIYO model allows fine‑tuning of image size while maintaining focus.
Confirm that the projected image is sharp by focusing the lens; the HAPPRUN projector includes a focusing wheel that can be adjusted until the centre of the test pattern appears crisp.
Step 4: Capture Colour Data with a Calibration Sensor
Place a colour measurement sensor (e.g., X‑Rite i1Display Pro or Datacolor Spyder) at the centre of the projected image, ensuring the sensor’s surface is perpendicular to the screen. The sensor should be positioned at a typical viewing distance to replicate real‑world perception.
Initiate the measurement sequence in the calibration software; the program will display each test patch while the sensor records luminance and chromaticity values. The process typically takes five to ten minutes for a full colour profile.
During measurement, keep the ambient lighting constant; any change can cause the sensor to record inaccurate data.
After the software completes the capture, it will generate a raw colour profile (ICC or DCP) that reflects the projector’s native output characteristics.
Step 5: Create a Custom Colour Profile
Using the calibration software, apply a target gamma curve (usually 2.2 for video) and a target white point (commonly D65, 6500 K). The software will then calculate correction tables that map the projector’s native output to the desired standard.
Save the resulting profile with a descriptive name, such as “AKIYO Mini Projector – Calibrated – Rec. 709”. Load the profile into the operating system’s colour management settings, assigning it to the projector display.
If the projector supports external LUT (look‑up table) loading, upload the generated LUT directly to the device via the HDMI or USB interface. This method bypasses the operating system and applies correction at the hardware level, yielding the most accurate results.
Validate the profile by re‑displaying the colour bars and confirming that the measured values now fall within the industry‑accepted tolerances (ΔE < 2 for critical work).
Step 6: Fine‑Tune Brightness and Contrast
After colour correction, adjust the projector’s brightness and contrast settings to achieve the desired black level and peak luminance. The AKIYO Mini Projector provides a 200 ANSI lumen output; for a dark room, a setting of 30‑40 % brightness often yields deep blacks without sacrificing detail.
Use the built‑in 2000:1 contrast ratio as a guideline, but rely on visual assessment of the greyscale ramp to avoid crushing shadow detail.
If the projector includes a “Dynamic Range” or “HDR” mode, ensure it is disabled unless the source material is HDR, as this can interfere with the calibrated profile.
Document the final settings (brightness, contrast, colour temperature) in a reference sheet for future re‑calibration.
Step 7: Verify Real‑World Content
Play a high‑quality video clip with known colour grading (e.g., a Blu‑ray trailer) and observe the image on the screen. The colours should appear natural, and skin tones should be rendered accurately.
For additional confidence, compare the projected image to the same clip on a reference monitor that is already calibrated. Minor differences are acceptable, but large deviations indicate a need to revisit earlier steps.
If the projector will be used outdoors, repeat the calibration after setting up a portable screen and adjusting for ambient light; the HAPPRUN Native 1080P Projector’s outdoor‑friendly design makes it a suitable benchmark for such scenarios.
Finally, store the calibration profile on a USB drive for quick restoration if the projector is reset or firmware is updated.
Tips & Pro Tips
- Use a neutral grey background on the wall when measuring; coloured walls introduce a bias that can affect the sensor reading.
- When calibrating multiple projectors in the same room, ensure each device is positioned at the same height and angle to maintain consistency.
- The AKIYO Mini Projector’s Bluetooth 5.2 can connect to wireless headphones for silent calibration sessions, preventing external audio distractions.
- For precise focus, employ the zoom function to fill the screen without moving the projector; this reduces the risk of misalignment during keystone correction.
- Regularly clean the lens using a soft microfiber cloth; dust particles scatter light and can cause colour shifts over time.
- If the built‑in speaker is insufficient for audio‑critical work, pair the projector with a Bluetooth speaker, as demonstrated in the AKIYO review where users reported excellent sound after connecting a high‑quality speaker.
Troubleshooting
Problem: Colours appear overly saturated after calibration.
Solution: Verify that the target colour space matches the source material (Rec. 709 for HD video). Reduce the saturation adjustment in the calibration software and re‑export the profile.
Problem: Image flickers or drops frames during wireless casting.
Solution: Use the AKIYO Mini Projector’s P2P direct connection, which bypasses congested Wi‑Fi networks, or switch to a wired HDMI connection for stable data transfer.
Problem: Calibration sensor reports inconsistent readings across the screen.
Solution: Ensure the projector is level; the AKIYO’s 360° rotating stand helps achieve a perfectly vertical projection. Re‑check keystone correction and re‑focus the lens.
Problem: Brightness is too low for outdoor use.
Solution: Increase the projector’s brightness setting to 70‑80 % and consider using a high‑gain projection screen to amplify perceived luminance.
Conclusion
This guide has outlined a comprehensive workflow for creating a custom colour profile for a mini projector, from preparing the environment to validating real‑world content. By employing the AKIYO Mini Projector, the HAPPRUN Native 1080P Projector, and the Aurzen Roku TV Portable Projector as reference tools, one can achieve colour accuracy that rivals much more expensive systems. Consistent calibration enhances visual fidelity, improves audience experience, and extends the useful life of the projector. Readers are encouraged to follow the steps, document their settings, and revisit the process whenever the projector’s firmware or viewing conditions change.
Products Mentioned in This Guide
Frequently Asked Questions
Why should I create a color profile for my mini projector?
A custom profile corrects color inaccuracies, delivering true-to-source hues for movies, presentations, or artwork.
What basic equipment do I need for projector color calibration?
You need a mini projector, a calibrated color reference disc, a computer with HDMI output, a high‑speed HDMI cable, and calibration software.
Can I calibrate my projector without expensive software?
Yes, free tools like DisplayCAL work well when paired with a compatible colorimeter or reference disc.
How often should I recalibrate my mini projector?
Recalibrate every 3–6 months or after moving the projector to a different lighting environment.
Does the projector’s lamp life affect the color profile?
Yes, as the lamp ages its brightness and color shift, so update the profile when you notice noticeable color drift.