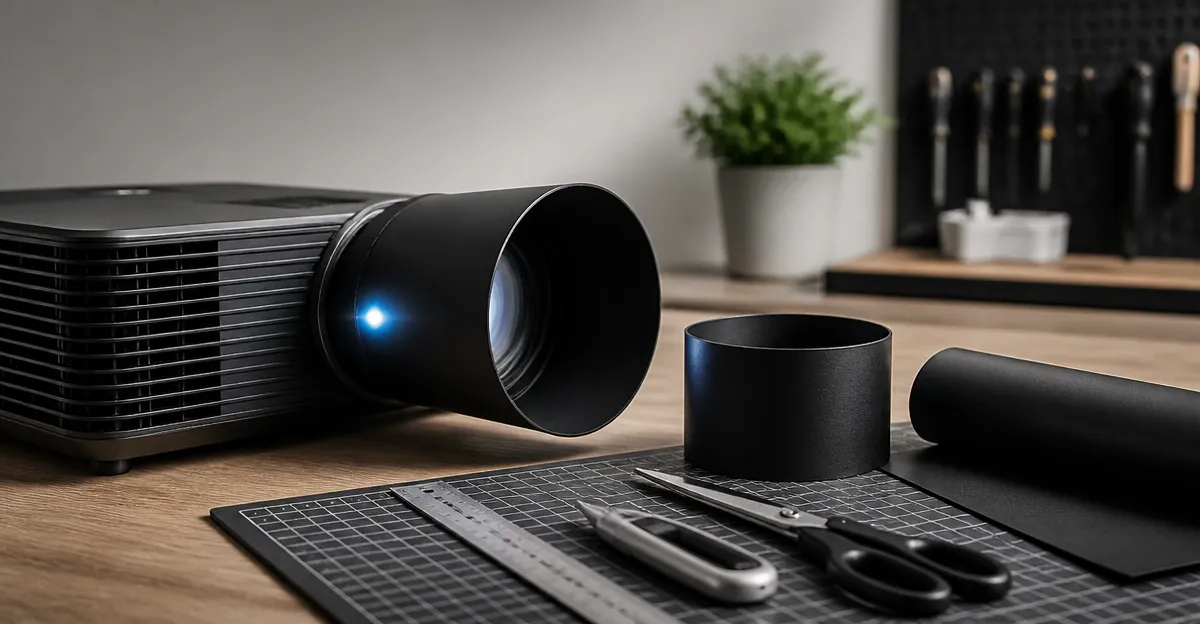
How to Make a DIY Projector Lens Hood to Reduce Flare: Easy Step‑by‑Step Guide
Introduction
Projectors often suffer from unwanted light flare that softens contrast and diminishes colour fidelity. A well‑designed lens hood blocks stray light while preserving the intended projection field. This guide teaches the reader how to construct a custom hood using inexpensive, readily available materials. By following each step, one will understand the optical principles behind flare, learn practical fabrication techniques, and discover tools that simplify the process. The result is a professional‑looking solution that enhances viewing comfort in home theatres, classrooms, or office meeting rooms.
What You’ll Need
- Cardboard, foam board, or lightweight plywood for the hood body.
- Utility knife or precision cutter.
- Measuring tape and ruler.
- Hot glue gun or strong adhesive.
- Black matte paint or spray paint to minimise reflections.
- Optional mounting hardware – see product recommendations below.
While many of these items are common household supplies, a few specialised tools can accelerate assembly and improve durability. The following products are suggested where they add genuine value.
Step 1: Measure Your Projector Lens
The first task is to obtain accurate dimensions of the lens barrel. Use a measuring tape to record the diameter at its widest point and the distance from the front glass to the mounting flange. Write these numbers down; they will dictate the inner diameter of the hood and the length of the flare‑blocking cone. A precise measurement prevents vignetting, which occurs when the hood is too narrow and cuts off part of the projected image.
For users who need a stable platform while measuring, the XINLEI Universal Projector Screen Wall Mount provides a sturdy L‑shaped bracket that can hold the projector securely against a wall or ceiling. Its 6‑inch adjustable extension allows the screen to sit 1.5‑5 inches from the surface, giving you clear access to the lens without moving the projector. The mount supports up to 66 lb, is rated 4.7/5 stars, and costs $9.99, making it an economical choice for a temporary work station.
Step 2: Design the Hood Profile
With the lens dimensions in hand, sketch a simple conical shape on paper. The hood’s inner angle should be slightly larger than the lens’s field of view, typically 30‑40 degrees for most home projectors. This ensures the projected image is unobstructed while stray light from the room is blocked. Calculate the length of the cone using the formula: length = (diameter / 2) / tan(half‑angle). For a 2‑inch diameter lens and a 35‑degree angle, the hood will be roughly 1.6 inches long.
If you prefer a pre‑engineered mounting solution, the VIVO Universal Adjustable Ceiling Projector Mount offers a low‑profile bracket that positions the projector 6 inches from the ceiling. Its fully adjustable tilt and swivel allow fine‑tuning of the projection angle, which is essential when testing the hood’s effectiveness. The mount holds up to 30 lb, carries a 4.5/5 rating, and is priced at $19.99.
Step 3: Cut the Hood Material
Transfer the sketch onto your chosen material. Foam board works well because it is lightweight, easy to cut, and absorbs stray light. Place the board on a flat surface, align a ruler with the centreline, and trace the outer and inner circles of the cone. Use a utility knife to cut the outer shape first, then remove the inner section to create a hollow tube. Sand any rough edges to avoid paint splatter.
For added rigidity, some builders prefer a thin plywood sheet. In that case, a WALI Universal Projector Screen Ceiling Mount can serve as a temporary clamp while the wood cures. Its 6‑inch L‑brackets are adjustable from 1.5‑5 inches, matching the dimensions you designed. The mount is rated 4.6/5 stars, includes mounting hardware, and costs $9.99.
Step 4: Assemble the Hood
Apply a thin layer of hot glue along the inner rim of the outer cone, then press the inner tube into place. Ensure the tube is centred; any offset will create uneven light blockage. Once the adhesive sets, reinforce the seam with additional glue or a small strip of duct tape for extra durability. Paint the exterior matte black to absorb reflected light; avoid glossy finishes, which can bounce stray illumination back onto the lens.
When the hood is ready, attach it to the projector using the mounting hardware from the earlier step. The CABTE No‑Drilling Metal Projector Mount provides a versatile, hole‑free solution that clamps onto a sofa arm or bedside table. Its perforated design improves heat dissipation, an important consideration because the hood can trap warmth. The mount supports up to 44 lb, has a 4.6/5 rating, and is priced at $20.99.
Step 5: Secure the Hood to the Lens
Slide the assembled hood onto the lens barrel until it sits flush against the front glass. If the fit is loose, wrap a thin layer of foam tape around the inner edge of the hood before insertion. This creates a snug seal without scratching the lens coating. Verify that the hood does not interfere with the projector’s focus ring or ventilation vents.
For users who travel frequently, the LUXJA Carrying Bag offers a padded compartment that can store the completed hood, mounting brackets, and tools. Made of heavy‑duty nylon with multiple elastic pockets, the bag protects delicate components during transport. It costs $20.99, holds a 4.7/5 rating, and measures 9.75 × 8.25 × 6.5 inches.
Step 6: Test and Fine‑Tune
Power on the projector in a dimly lit room and project a high‑contrast test pattern onto a screen. Observe the edges of the image for any darkening caused by the hood. If vignetting occurs, gently trim the inner diameter or increase the cone length by a few millimetres. Re‑paint any newly exposed surfaces to maintain the matte finish.
Adjust the mounting angle using the VIVO mount’s tilt and swivel features until the image fills the screen without distortion. Ensure the projector’s cooling vents remain unobstructed; excessive heat can reduce lamp life. Once satisfied, secure all bolts and enjoy a flare‑free viewing experience.
Tips & Pro Tips
- Use black felt or velour inside the hood for additional light absorption.
- Apply a thin coat of anti‑static spray to prevent dust from adhering to the interior.
- When painting, work in a well‑ventilated area and allow each coat to dry completely.
- For ultra‑large lenses, consider a two‑piece hood that screws together, allowing easy removal for maintenance.
- Regularly check the mounting brackets for loosening, especially after moving the projector.
Troubleshooting
| Problem | Possible Cause | Solution |
|---|---|---|
| Image appears darker at the edges | Hood inner diameter too small | Trim the inner tube slightly or increase cone length. |
| Projector overheats | Ventilation blocked by hood | Cut small ventilation slots near the rear of the hood. |
| Hood shifts during use | Mount not securely fastened | Re‑tighten bolts on the chosen mount; consider using the CABTE clamp for added stability. |
Conclusion
Creating a DIY projector lens hood is a straightforward project that yields immediate improvements in image clarity and contrast. By measuring accurately, designing a proper cone, and using the right mounting hardware, one can eliminate flare without compromising projector performance. The recommended products – XINLEI Wall Mount, WALI Ceiling Mount, VIVO Adjustable Mount, CABTE No‑Drilling Mount, and LUXJA Carrying Bag – streamline each phase of construction while remaining affordable. Implement the tips and troubleshooting advice to fine‑tune the hood, and enjoy a cinema‑quality picture in any environment.
Products Mentioned in This Guide
Frequently Asked Questions
What materials are best for building a DIY projector lens hood?
Cardboard, foam board, or lightweight plywood work well because they’re easy to cut, lightweight, and can be painted matte black to reduce reflections.
How does a lens hood reduce flare in a projector?
It blocks stray ambient light from reaching the lens while allowing the intended projection beam to pass, improving contrast and colour accuracy.
What tools do I need to cut and assemble the hood?
A utility knife or precision cutter, measuring tape or ruler, and a hot‑glue gun (or strong adhesive) are essential for accurate cuts and secure assembly.
Do I need to paint the hood, and what finish is recommended?
Yes, apply a matte black paint or spray paint to minimize internal reflections and ensure the hood doesn’t add glare to the projected image.
Can the DIY hood be mounted permanently on the projector?
Yes, using optional mounting hardware such as brackets or Velcro strips allows a secure, removable attachment without damaging the projector.