How to Build a DIY Projector Screen from Reclaimed Materials: Step‑by‑Step Upcycled, Budget‑Friendly Guide
Introduction
One will discover how to transform everyday reclaimed items into a professional‑grade projector screen that enhances image clarity and colour fidelity. This guide explains the rationale behind each material choice, outlines the required tools, and provides detailed instructions that any intermediate DIY enthusiast can follow. By the end of the process one will possess a durable, tensioned screen that rivals store‑bought alternatives while remaining budget‑friendly. The approach also promotes sustainable reuse, reducing waste and extending the life of discarded household components.
What You Will Need
- Reclaimed wooden frame material (e.g., old picture‑frame moulding or pallet boards)
- Screen surface material – options include fiberglass screen roll, stainless‑steel mesh, or a combination of both
- Adhesive repair tape for sealing gaps
- Basic hand tools: saw, drill, screwdriver, measuring tape, scissors, utility knife
- Safety equipment: gloves, safety glasses
Below are the recommended products that simplify each phase of the build. The first mention of each product is linked to its Amazon page for convenient purchase.
Step 1 – Prepare the Frame
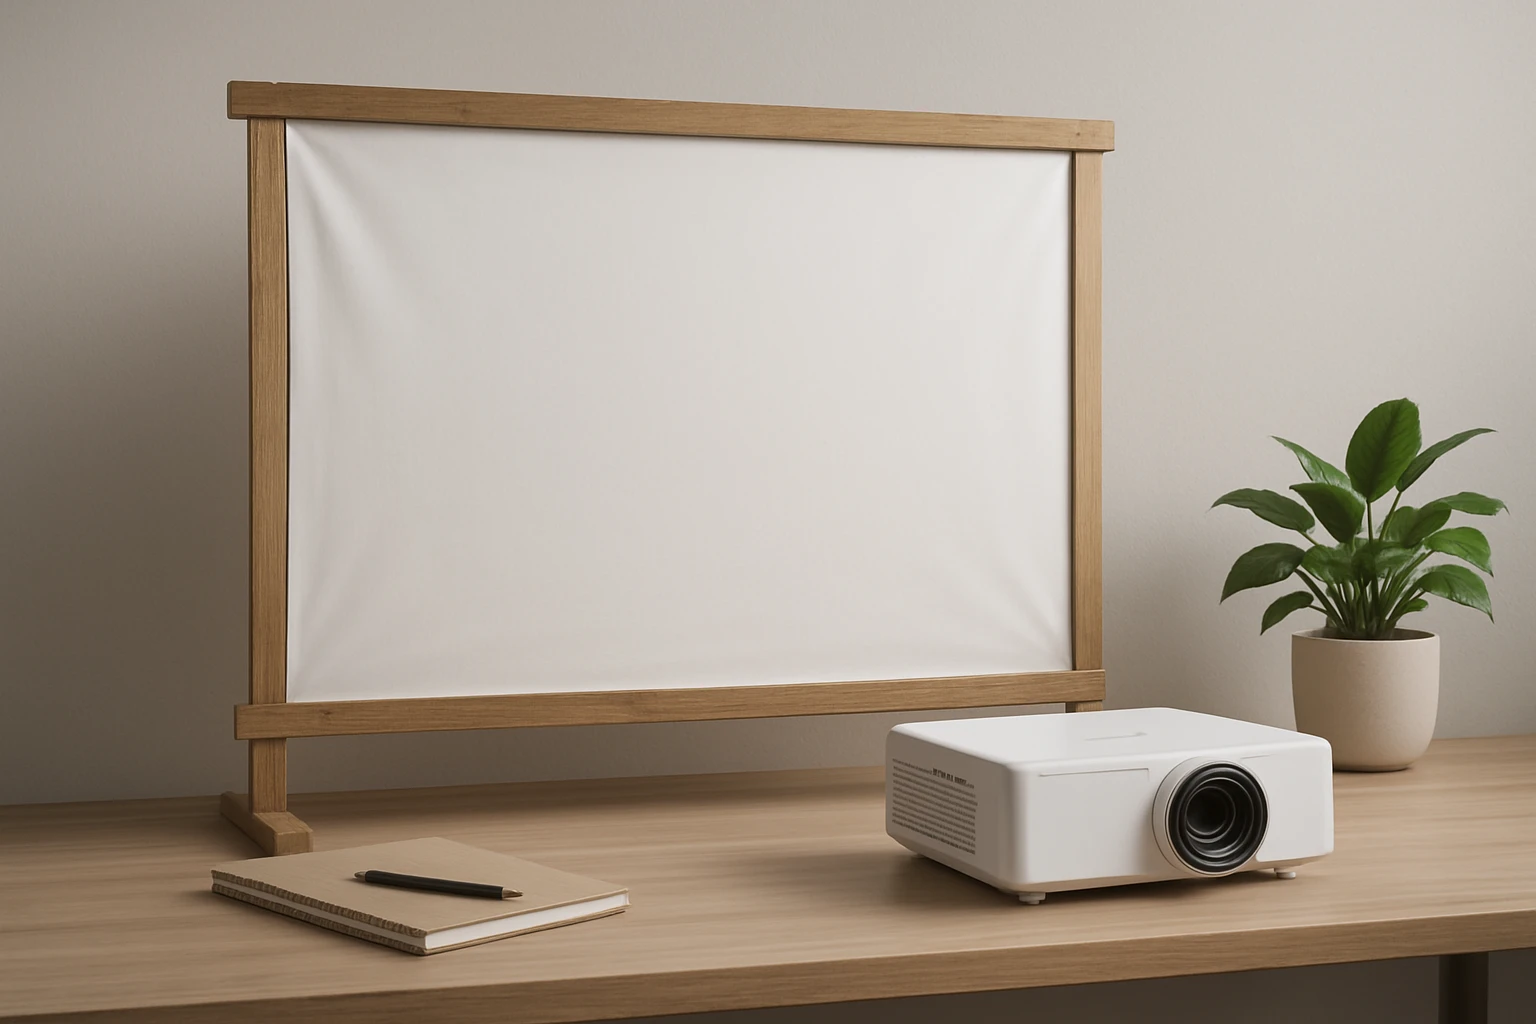
Measure the desired screen dimensions, typically 100 inches wide by 56 inches high for a 16:9 aspect ratio. Cut the reclaimed wood to length using a saw, ensuring each piece is square‑cut to avoid uneven tension later. Drill pilot holes at each corner to allow for secure fastening with screws. One should sand any rough edges to prevent splintering during handling.
For added stability, one may reinforce the corners with metal brackets. Although not mandatory, the brackets provide a rigid skeleton that resists warping over time.
Step 2 – Install the Primary Screen Mesh
The core of a projector screen is the mesh that diffuses light while allowing clear image transmission. For most indoor environments a fiberglass screen roll offers an optimal balance of durability, UV protection, and airflow. The Pshopping Fiberglass Screen Roll provides a 36 inch by 100 foot roll of heavy‑duty mesh that can be trimmed to exact dimensions with scissors. Its 18 × 16 mesh size blocks insects while preserving breathability, and the UV‑protected coating extends lifespan to five‑to‑eight years.
Unroll the mesh over the frame and align it so that excess material extends evenly on all sides. Use a utility knife to trim the mesh to the exact frame size, leaving a 1‑inch overhang for attachment. Secure the mesh to the wooden frame with a staple gun or small finishing nails, spacing fasteners every 4‑6 inches to maintain even tension.
If a metal‑looking finish is desired, the CHAYUFUN Stainless Steel Wire Mesh can be layered over the fiberglass. This 15.7 × 59 inch stainless‑steel mesh offers a 1 mm aperture and high‑temperature resistance, making it suitable for outdoor installations where heat and corrosion are concerns. Its tight structure of over 330,000 holes per piece ensures a smooth surface that does not sag under tension.
Step 3 – Reinforce with Additional Mesh (Optional)
For projects that require multiple small sections, such as a portable screen, the Reastar Stainless Steel Mesh Screens provide pre‑cut 12 × 8 inch panels. Each panel features a 20‑mesh count and a 52 % open area, delivering excellent ventilation and light diffusion. One can attach these panels to the main mesh using small zip ties or adhesive tape, creating a modular design that can be expanded or repaired easily.
When using the Reastar panels, ensure that the edges are sanded or folded to prevent sharp points that could damage the surrounding material. The panels are cut with tin snips, and the flexibility of the stainless steel allows them to conform to slight curvature if a curved screen is desired.
Step 4 – Seal Edges and Repair Small Tears
Even with careful handling, the mesh may develop minor tears during installation. The Secopad Window Screen Repair Tape offers a fast, adhesive solution. This 2 inch × 30 foot fiberglass tape adheres strongly to both fiberglass and stainless‑steel surfaces, providing a waterproof seal that functions in temperatures ranging from –4 °F to 158 °F.
Cut a piece of repair tape slightly larger than the tear, peel the release liner, and press firmly onto the damaged area. The tape remains flexible, allowing the screen to retain its tension while preventing insects from entering through the repaired spot. For larger holes, overlap multiple tape strips to ensure full coverage.
Step 5 – Apply Tension and Finish
With the mesh securely attached, one must apply uniform tension to eliminate sagging. Attach turnbuckles or rope pulleys to the frame corners and gradually tighten until the surface is taut but not overstretched, which could cause tearing. Verify that the screen lies flat by projecting a test image and checking for distortion.
Finally, paint the wooden frame with a matte black or dark‑gray finish to minimise light reflection. Allow the paint to dry completely before mounting the screen on a wall or ceiling using brackets or a simple hanging system.
Tips & Pro Tips
- Always wear gloves when cutting stainless‑steel mesh to avoid cuts from sharp edges.
- Use a level when aligning the frame to ensure a perfectly rectangular screen.
- If the screen will be used outdoors, consider applying a weather‑proof sealant to the wooden frame.
- For a portable version, attach the frame to lightweight aluminum channels instead of heavy wood.
- Test the projector distance and throw ratio before final installation to guarantee optimal image size.
Troubleshooting
- Screen appears blurry: Check for uneven tension or wrinkles in the mesh. Adjust turnbuckles until the surface is smooth.
- Light leaks around edges: Ensure the mesh overhang is securely fastened and seal any gaps with Secopad repair tape.
- Mesh tears during tensioning: Reduce tension incrementally and reinforce the area with additional mesh or repair tape.
Conclusion
One has now learned how to repurpose reclaimed wood and affordable screen materials into a high‑performance projector screen. By following the step‑by‑step instructions, selecting the appropriate mesh, and applying proper tension, the result is a durable, budget‑friendly screen that delivers cinematic quality. The guide encourages further experimentation with different materials, sizes, and mounting methods, empowering readers to customize their home theatre experience.
Products Mentioned in This Guide


Frequently Asked Questions
What reclaimed materials can be used for the frame of a DIY projector screen?
Old picture‑frame moulding, pallet boards, or any sturdy wood scrap can serve as the frame, provided it’s straight and can be securely joined.
Which screen surface material offers the best image quality for an upcycled projector screen?
A fiberglass screen roll delivers smooth, high‑gain image reproduction, while stainless‑steel mesh works for outdoor or high‑light environments.
How do I ensure the screen stays taut and wrinkle‑free?
Attach the screen material to the wooden frame with adhesive repair tape and use corner brackets or clamps to apply even tension before sealing the edges.
What basic tools are required to build the screen?
You’ll need a saw, drill, screwdriver, measuring tape, scissors or utility knife, plus safety glasses and gloves.
Is the upcycled screen as durable as a store‑bought one?
When properly framed and tensioned, an upcycled screen can match the durability and image clarity of commercial screens while costing far less.