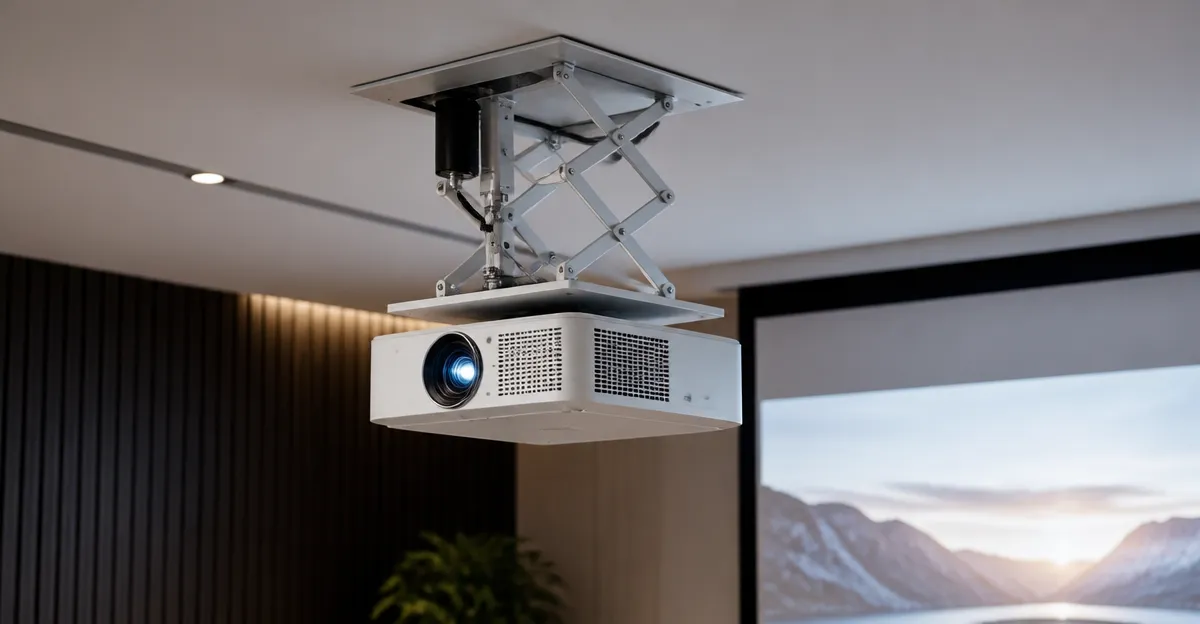
How to Build a Motorized Mini Projector Mount (DIY): Step‑by‑Step Guide to a Smooth Pan‑and‑Tilt Setup
Introduction
The modern home cinema or classroom often requires a projector that can be positioned precisely without manual adjustment. This guide teaches the reader how to build a motorized mini projector mount that provides smooth pan‑and‑tilt motion, reliable stability, and easy integration with existing projection equipment. By following the instructions, one will gain a functional solution that saves time, reduces wear on the projector, and enhances the viewing experience.
The value of a motorized mount lies in its ability to adapt to different screen locations, accommodate temporary setups, and allow remote control via a smartphone or wall panel. The guide balances practical DIY techniques with recommended ready‑made components, ensuring that even an intermediate builder can achieve professional results.
All tools and products mentioned are selected for their compatibility, durability, and positive user feedback. The reader may choose to purchase the suggested items or substitute equivalent hardware, provided that the specifications are respected.
The following sections outline the required materials, each construction step, helpful tips, and troubleshooting advice.
What You'll Need
- Motorized pan‑tilt kit (stepper motor, driver board, microcontroller such as Arduino Nano, power supply)
- Mounting bracket – recommended BAISHUN Projector Wall Ceiling Mount for wall or ceiling installation
- Alternative heavy‑duty bracket – optional WALI Projector Ceiling Wall Mount for larger projectors or ceiling‑only setups
- Universal steel mount – optional VIVO Adjustable Projector Ceiling Mount for projects requiring up to 30 lb capacity
- Basic hand tools (drill, screwdriver set, level, measuring tape)
- Mounting hardware (M4 screws, wall anchors, washers – often included with the brackets)
- Wire management accessories (cable ties, zip sleeves)
- Safety equipment (gloves, safety glasses)
Step‑by‑Step Instructions
Step 1: Plan the Installation Site
Begin by selecting a location where the projector will have an unobstructed line of sight to the screen. Measure the distance from the ceiling or wall to the projected image area, and note the height required for optimal throw distance. Use a level to verify that the mounting surface is flat; uneven surfaces can cause misalignment during motorized movement.
Record the mounting hole pattern of the projector (typically a 1/4‑inch thread) and compare it with the specifications of the chosen bracket. The BAISHUN Projector Wall Ceiling Mount supports devices up to 4.4 lb and offers 360° rotation, making it ideal for mini projectors that weigh less than 2 kg.
If the projector exceeds this weight, consider the WALI Projector Ceiling Wall Mount, which holds up to 44 lb and provides both ceiling and wall configurations. For professional‑grade projectors approaching 30 lb, the VIVO Adjustable Projector Ceiling Mount delivers a robust steel construction.
Mark the mounting points on the wall or ceiling, ensuring that studs or solid anchors are located directly behind the marks.
Step 2: Install the Mounting Bracket
Secure the selected bracket to the prepared surface using the supplied screws and anchors. For drywall, locate a stud and drill pilot holes; for concrete or brick, use masonry anchors as recommended by the manufacturer. The BAISHUN bracket requires a simple three‑hole setup and includes all necessary hardware.
After fastening, verify that the bracket is level by placing a spirit level on the base. Adjust the screws if necessary to achieve perfect horizontality. A level installation prevents cumulative drift when the motorized pan‑tilt unit operates.
Once the bracket is firmly attached, attach the projector platform (the part of the bracket that holds the projector) using the 1/4‑inch thread. Tighten the locknut until the projector is stable but not over‑tightened, as excessive force can strip the threads.
The WALI and VIVO brackets feature additional adjustable arms; follow the manufacturer’s instructions to set the arm length appropriate for the projector’s dimensions.
Step 3: Prepare the Motorized Pan‑Tilt Mechanism
Assemble the stepper motor and driver board according to the kit instructions. Connect the motor shafts to the pan and tilt axes using the supplied couplers. Ensure that the couplers are firmly seated; any slippage will result in inaccurate movement.
Mount the motorized unit to the back of the projector bracket. Most kits include a small metal plate with pre‑drilled holes that align with the bracket’s mounting points. Use M4 screws to attach the plate, taking care not to overtighten and distort the alignment.
Route the power and control wires through the cable management accessories to keep the installation tidy. Secure the wires with zip ties, leaving enough slack for future adjustments.
Program the microcontroller with the appropriate firmware that interprets remote commands into stepper pulses. Many open‑source libraries exist for Arduino‑based pan‑tilt control; select one that supports adjustable speed and acceleration profiles.
Step 4: Integrate the Control Interface
Connect the microcontroller to a power supply rated for the motor current (typically 12 V, 2 A). Verify the polarity before powering the system to avoid damage. Use a USB cable or wireless module (Bluetooth or Wi‑Fi) to enable remote control from a smartphone or tablet.Test the pan and tilt functions individually. Command a small rotation of 10 degrees in each direction and observe the projector’s response. If the movement is jittery, adjust the microcontroller’s acceleration settings until the motion is smooth.
Calibrate the zero position by aligning the projector with the center of the screen and storing the current step count as the home position. This step ensures that subsequent commands start from a known reference point.
Finally, create a simple user interface that includes preset angles for common screen sizes. This interface can be a web page hosted on the microcontroller or a dedicated mobile app.
Step 5: Secure the Projector and Perform Final Alignment
Place the projector onto the mounting platform and tighten the locknut. Verify that the projector does not shift when the motorized unit moves; if movement occurs, re‑tighten the locknut or add a thin washer for extra friction.
Power on the projector and run a test pattern (grid or cross‑hair) to assess corner‑to‑corner alignment. Use the pan‑tilt controls to fine‑tune the image until the edges of the pattern align perfectly with the screen borders.
Once the image is correctly positioned, lock the motorized unit’s position by disabling further movement or by enabling a “hold” mode in the firmware. This prevents accidental drift when the system is idle.
Document the final step counts for the home position and any custom presets. Store this information in a text file on the microcontroller for future reference.
Tips & Pro Tips
- When mounting on a ceiling, use a stud finder to locate joists; attaching to joists provides maximum load capacity.
- Apply a small amount of non‑slip rubber pad between the projector base and the bracket to reduce vibration.
- For silent operation, select stepper motors with microstepping drivers; this reduces audible whine during movement.
- Consider adding a limit switch to each axis to prevent the motor from overrunning its mechanical stops.
- Label each cable with its function (power, signal, ground) to simplify future troubleshooting.
- Regularly inspect the mounting screws for loosening, especially after the first few weeks of use.
Troubleshooting
| Problem | Possible Cause | Solution |
|---|---|---|
| Projector drifts after movement | Loose locknut or insufficient friction | Tighten the locknut, add a rubber washer, and verify that the motor driver is set to hold torque when idle. |
| Motor makes clicking noises | Improper stepper current settings | Adjust the current limit on the driver board to match the motor’s rated current. |
| Mounting bracket wobbles | Installation on drywall without studs | Re‑mount using appropriate anchors or relocate to a stud. |
| Remote control does not respond | Bluetooth/Wi‑Fi module not paired | Restart the microcontroller, re‑pair the device, and ensure the correct COM port is selected. |
Conclusion
By following this comprehensive guide, the reader has learned how to construct a motorized mini projector mount that delivers smooth pan‑and‑tilt motion, reliable stability, and convenient remote control. The combination of a quality mounting bracket, such as the BAISHUN Projector Wall Ceiling Mount, and a well‑programmed motorized mechanism results in a professional‑grade solution suitable for home theaters, classrooms, and small conference rooms.
The reader is encouraged to experiment with preset angles, integrate additional sensors, or expand the system to include automated screen lowering. Continuous refinement will further enhance the viewing experience and extend the lifespan of the projector.
Products Mentioned in This Guide
Frequently Asked Questions
What basic components are needed to build a motorized mini projector mount?
You need a pan‑and‑tilt bracket, two small DC gear motors, a microcontroller (e.g., Arduino), a motor driver board, power supply, and mounting hardware.
Can the motorized mount be controlled remotely?
Yes, you can integrate Bluetooth, Wi‑Fi, or IR modules to allow smartphone or wall‑panel control of pan and tilt angles.
How do I ensure smooth and quiet motion for the projector?
Use geared motors with low RPM, add rubber dampers or foam pads at pivot points, and implement microstepping control in the firmware.
Is it safe to use the DIY mount with any projector size?
As long as the bracket’s load rating exceeds the projector’s weight and the base is securely anchored, the mount works for most home‑cinema projectors.
What troubleshooting steps help if the mount stalls or jitters?
Check motor wiring, verify power voltage, tighten all bolts, and calibrate the motor driver’s current limit to match the motor specifications.