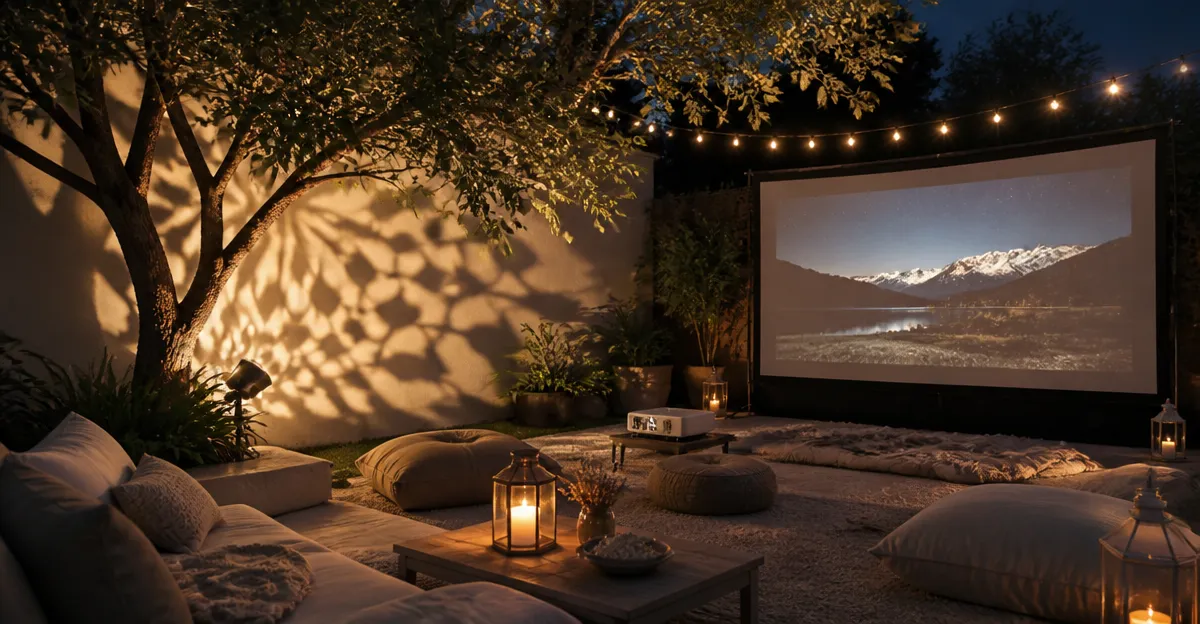
How to Create Stunning Ambient Gobo Projections for Outdoor Movie Nights: DIY Setup, Placement & Lighting Tips
Introduction
One will discover how to transform a simple backyard into a cinematic venue by using ambient gobo projections. The guide explains the principles of logo projection, the selection of suitable equipment, and the precise placement required for optimal visibility. By following the instructions, the organizer can achieve a professional‑grade atmosphere without hiring external lighting technicians. The value lies in the ability to reinforce branding, create thematic moods, and enhance audience engagement during outdoor screenings. This article provides actionable steps, practical tips, and troubleshooting advice to ensure a successful projection experience.
What You'll Need
- One gobo projector capable of outdoor use (see product recommendations below).
- Custom logo or image file in high‑resolution formats such as PNG, PDF, or AI.
- Power source with appropriate voltage and extension cords rated for outdoor conditions.
- Mounting hardware: brackets, clamps, or tripods suitable for walls, ceilings, or ground placement.
- Remote control or wired controller for on‑the‑fly adjustments.
- Measuring tape, level, and basic hand tools for installation.
- Protective coverings or weather‑proof enclosures if the event extends into inclement weather.
Step 1: Plan the Projection Area
The organizer should begin by measuring the intended screen surface and the distance from the projector to that surface. A clear line of sight must be maintained, and any obstacles such as trees or awnings should be accounted for. For outdoor movie nights, a flat white wall, a portable screen, or a light‑colored fence often yields the best results. The projection distance influences the required brightness; a distance of 10‑15 feet typically demands a projector with at least 50 W output.
When the area is defined, the organizer can decide whether the gobo will serve as a decorative border, a branding element, or a thematic motif. This decision guides the size of the custom lens and the angle of installation. Sketching a simple layout on paper helps visualize the final effect and prevents costly adjustments later.
Step 2: Choose a Gobo Projector and Order a Custom Lens
Selecting a projector that matches the environmental conditions is crucial. For outdoor use, a unit with an IP67 waterproof rating and a robust aluminum housing ensures durability. The YYD Store Logo Projector Light (price $175.00, rating 4.6/5 from 54 reviews) integrates an OSRAM 50W LED chip, providing high brightness and a service life of up to 50,000 hours. Its free custom gobo lens, high‑definition optical system, and remote control make it ideal for step‑by‑step alignment.
Alternatively, the YKGOBO LED Logo Projector (price $129.99, rating 4.7/5 from 89 reviews) offers a projection distance of up to 33 feet in low‑light environments and includes a wear‑resistant glass lens. Its compact size and three‑year warranty provide added confidence for one‑time events.
If higher output is required for larger venues, the COLIFINE 100W Logo Projector (price $288.00, rating 4.7/5 from 24 reviews) delivers 100 W of CREE LED power, ensuring vivid projections at distances beyond 30 feet. Its remote control supports fixed and rotating modes, allowing dynamic logo movement during intermissions.
For budget‑conscious organizers who still need strong performance, the COLIFINE 80W Logo Projector (price $238.00, rating 4.6/5 from 78 reviews) offers an 80 W LED source and the same IP67 protection, making it a versatile middle‑ground option.
Finally, the ARXENOVATH 50W Logo Projector (price $169.99, rating 4.7/5 from 54 reviews) provides a compact footprint, German‑engineered LED chips, and a projection range up to 32.8 feet, suitable for smaller storefront‑style installations.
After selecting the appropriate model, the organizer must email the logo file to the vendor‑provided address (e.g., [email protected] for YYD Store) to receive the custom glass gobo. The free lens service eliminates the need for third‑party manufacturing and ensures perfect optical alignment.
Step 3: Install Mounting Hardware and Power Supply
One should position the projector at the calculated distance, using a sturdy tripod, wall bracket, or ceiling mount. The mounting point must be level; a bubble level and a measuring tape guarantee accurate height and angle. For outdoor events, a weighted base or sandbag can prevent accidental tipping caused by wind.
The power cable should be routed through a waterproof conduit if the projector is placed near ground level. Extension cords must be rated for outdoor use (minimum 14 AWG) and protected with a surge protector to guard against voltage spikes. Connecting the remote control battery before mounting ensures that the unit can be powered on for final alignment without having to reach the projector.
If the chosen model includes an adjustable bracket (as with the ARXENOVATH 50W Logo Projector), the organizer can tilt the unit to compensate for uneven terrain. The bracket’s quick‑release mechanism simplifies repositioning during the event.
Step 4: Align, Focus, and Test the Projection
With the projector powered, one should use the remote to select the fixed projection mode for initial alignment. Aim the lens at the center of the screen and adjust the focus knob until the edges of the logo appear sharp. For rotating effects, switch to the rotating mode and observe the motion; the speed can be altered via the remote to match the desired ambiance.
It is advisable to perform a dark‑room test at least one hour before the movie begins. This allows the organizer to fine‑tune brightness, contrast, and rotation speed without audience distraction. If the projected image appears distorted, check that the gobo lens is seated correctly; the glass lens must sit flush against the projector housing, and the silver retaining ring should be tightened evenly.
Should the projection appear too faint, increase the LED brightness setting if the model supports variable output (the YYD Store projector offers a high‑brightness mode). Conversely, if the image washes out under ambient street lighting, consider adding a portable blackout curtain or scheduling the screening after sunset.
Step 5: Integrate Ambient Lighting and Finalize the Setup
Ambient lighting should complement, not compete with, the gobo projection. Soft, diffused LED string lights positioned behind the screen create a halo effect that enhances the logo without obscuring the film. The organizer can use warm‑white LEDs for a cozy atmosphere or cool‑white LEDs for a modern aesthetic.
When the movie begins, the remote can be used to toggle the gobo between static and rotating modes during intermissions, providing visual variety. The projector’s IP67 rating ensures that brief exposure to light rain will not damage the unit, but prolonged moisture should be avoided.
Finally, the organizer should record the configuration settings (focus distance, rotation speed, brightness level) for future events. This documentation reduces setup time for subsequent movie nights and ensures consistent quality.
Tips & Pro Tips
- Use a high‑resolution vector file for the logo to prevent pixelation when projected at large sizes.
- Place the projector slightly above eye level to avoid glare on the screen and to keep the logo within the viewer's peripheral vision.
- If the venue permits, power the projector from a generator equipped with a voltage regulator to maintain stable LED performance.
- For rotating projections, experiment with slow rotation speeds (1‑2 RPM) to create a subtle dynamic effect that does not distract from the film.
- Consider adding a small fan inside the projector housing if operating in hot climates; the aluminum alloy body dissipates heat efficiently, but additional airflow can extend LED lifespan.
Troubleshooting
Problem: The logo appears dim or uneven.
Solution: Verify that the projector is positioned within the recommended distance range. Increase brightness using the remote, and ensure the custom gobo lens is clean and free of dust.
Problem: The image is blurry after rain.
Solution: Allow the projector to dry completely before powering on. Use a soft microfiber cloth to gently clean the lens. If moisture persists inside the housing, contact the vendor for warranty service.
Problem: The rotation mechanism stalls.
Solution: Check the battery level of the remote and replace if necessary. Inspect the rotating gear for debris; a quick blow of compressed air often resolves the issue.
Conclusion
One now possesses a complete methodology for creating stunning ambient gobo projections during outdoor movie nights. By planning the projection area, selecting an appropriate waterproof projector, installing secure mounting, aligning the image, and integrating complementary lighting, the organizer can deliver a memorable visual experience. The recommended products provide reliable performance, professional‑grade optics, and convenient custom‑lens services, ensuring that the setup is both efficient and repeatable for future events.
Products Mentioned in This Guide
Frequently Asked Questions
What is a gobo projector and how does it work for outdoor movie nights?
A gobo projector projects a custom stencil (gobo) onto a surface, casting logos or patterns that add ambiance to outdoor screenings.
How far should I place the gobo projector from the screen for a clear projection?
Position the projector 8‑12 feet away, adjusting distance based on the projector’s throw ratio and desired image size.
What power requirements and safety measures are needed for an outdoor gobo setup?
Use a weather‑rated extension cord with the correct voltage (typically 120V/240V), and protect connections with waterproof covers and surge protectors.
Can I use my own logo or image for ambient projections, and which file formats work best?
Yes; high‑resolution PNG, PDF, or AI files provide sharp, crisp projections.
How can I prevent glare and ensure even lighting during an outdoor movie night?
Mount the projector at a slight angle, use diffusers or softboxes, and position it away from direct audience sightlines to minimize glare.